<?xml version="1.0" encoding="utf-8"?><feed xmlns="http://www.w3.org/2005/Atom" ><generator uri="https://jekyllrb.com/" version="3.10.0">Jekyll</generator><link href="https://www.markjberger.com/feed.xml" rel="self" type="application/atom+xml" /><link href="https://www.markjberger.com/" rel="alternate" type="text/html" /><updated>2025-09-09T15:31:41+00:00</updated><id>https://www.markjberger.com/feed.xml</id><title type="html">Mark J. Berger’s Blog</title><author><name>Mark J. Berger</name></author><entry><title type="html">MITM Yourself: Inspecting iOS HTTPS traffic</title><link href="https://www.markjberger.com/inspecting-ios-https-traffic/" rel="alternate" type="text/html" title="MITM Yourself: Inspecting iOS HTTPS traffic" /><published>2024-09-30T15:00:00+00:00</published><updated>2024-09-30T15:00:00+00:00</updated><id>https://www.markjberger.com/inspecting-ios-https-traffic</id><content type="html" xml:base="https://www.markjberger.com/inspecting-ios-https-traffic/"><![CDATA[<p><em>See the <a href="https://github.com/markberger/rh-cc-exporter/">rh-cc-exporter</a> Github
repo for all code mentioned in this post.</em></p>

<p>Robinhood recently launched a <a href="https://robinhood.com/creditcard/">credit card</a>
offering 3% cash back on all purchases. While the
<a href="https://apps.apple.com/us/app/robinhood-credit-card/id6462308655">app</a> is
fantastic, it has one major drawback: I can’t download my transactions as a CSV
or Quicken file. If this were a website, I could easily use Chrome DevTools to
inspect the HTTP requests and replay them in a Python script. Unfortunately
there is no web portal for the card - all I have is the app. So how can we
inspect the network traffic?</p>

<p>Turns out one way to do this is to set up a web proxy on a separate machine.
This computer will then record all of the traffic between the iOS app and
Robinhood servers. Once we have the requests, we can replay similar requests in
our script to obtain the transaction data. Essentially, we
<a href="https://en.wikipedia.org/wiki/Man-in-the-middle_attack">man-in-the-middle attack</a>
ourselves.</p>

<p>This process is easy to accomplish with mitmproxy. mitmproxy is an open-source
proxy tool that allows users to intercept, inspect, and modify HTTP and HTTPS
traffic, making it ideal for tasks like this. Simply install the tool and run
the proxy:</p>

<div class="language-plaintext highlighter-rouge"><div class="highlight"><pre class="highlight"><code>brew install mitmproxy
...
🍺  mitmproxy was successfully installed!

mitmproxy
</code></pre></div></div>

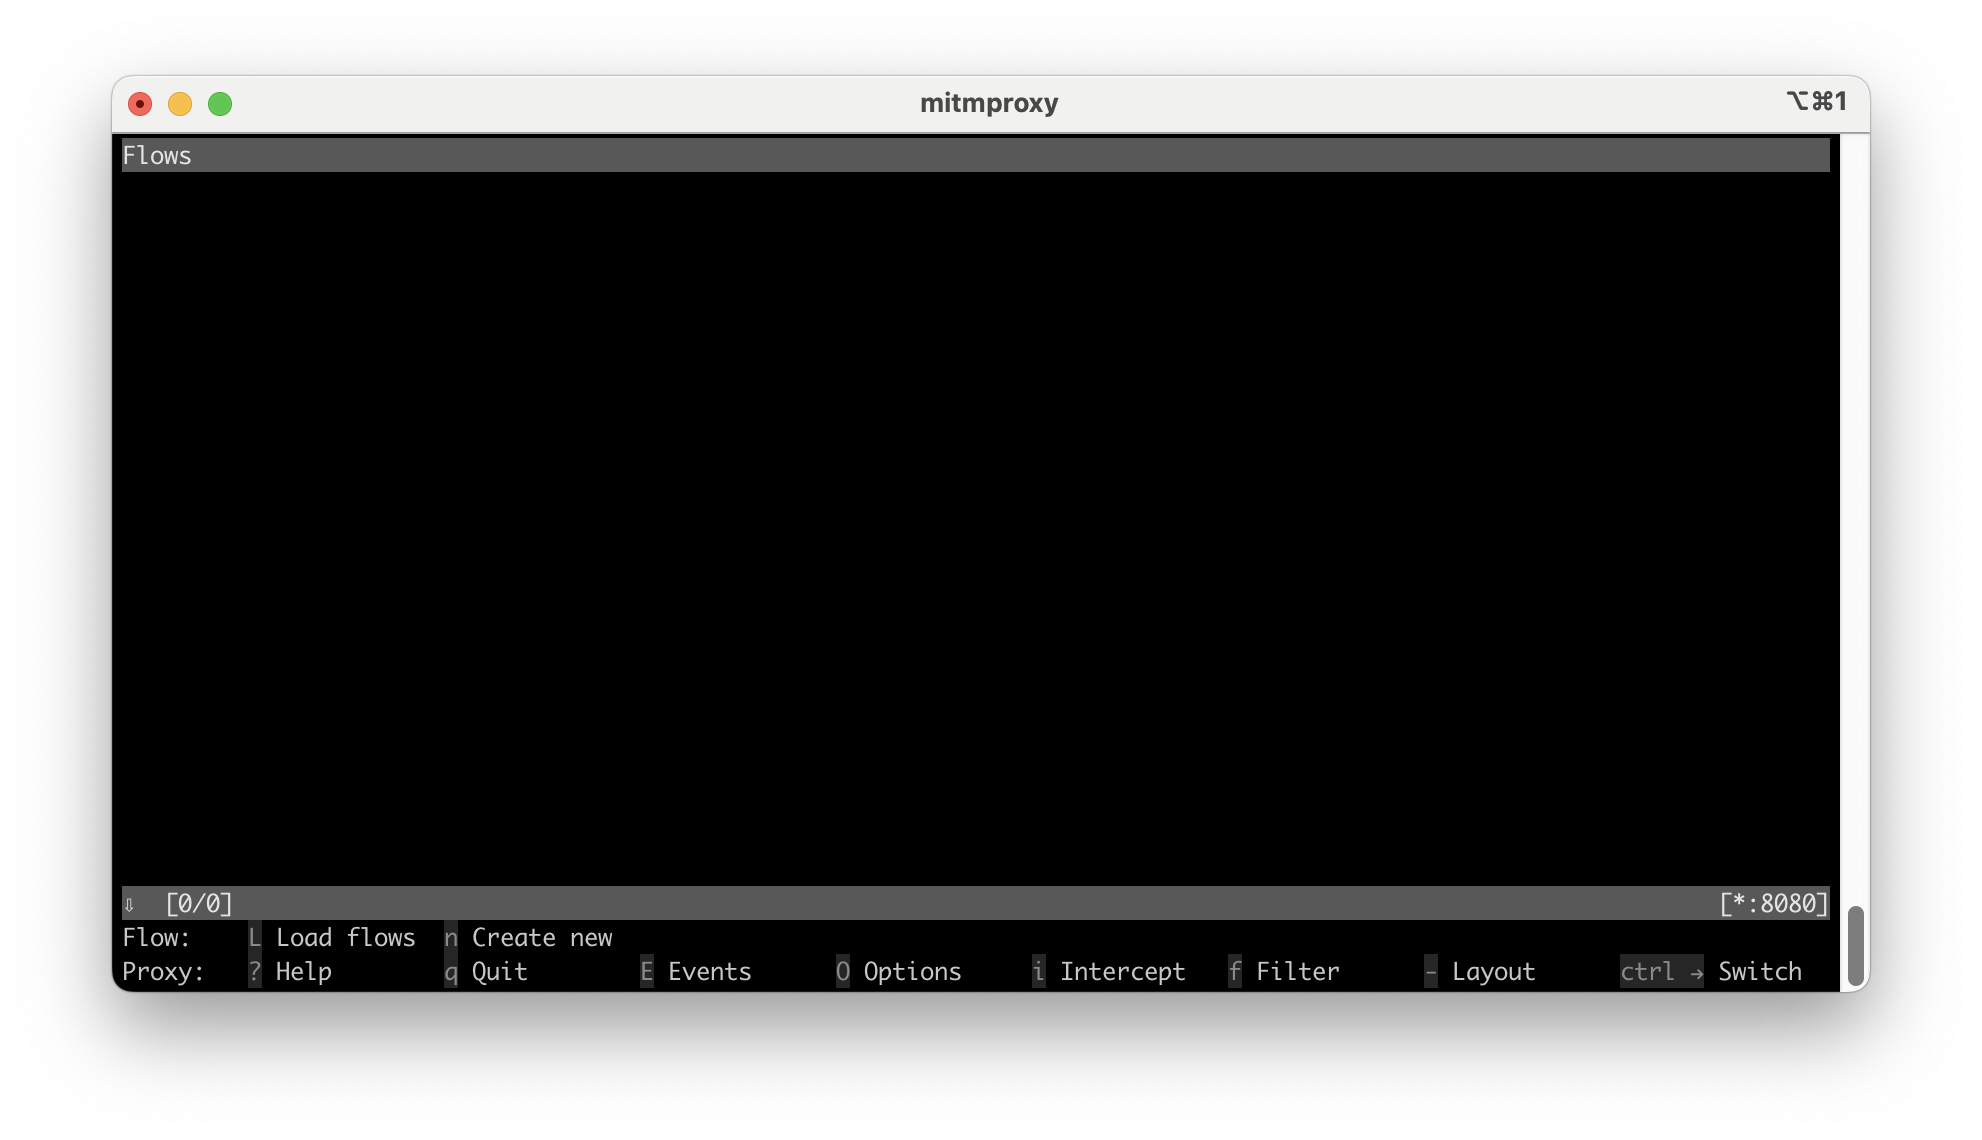
<p>You should see a blank screen like this:</p>

<div class="img-with-caption">
  <img src="/assets/img/2024-09-30/mitmproxy-blank.png" alt="mitmproxy running with no requests" class="img-large" />
  <div class="img-caption">mitmproxy running with no requests</div>
</div>

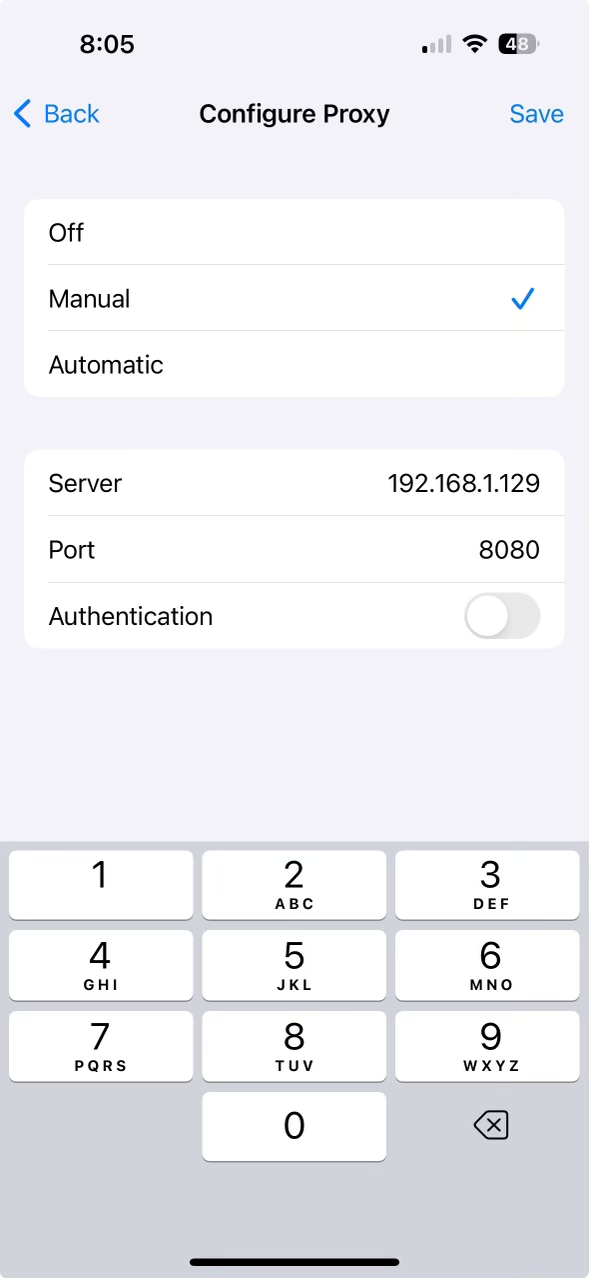
<p>Now run <code class="language-plaintext highlighter-rouge">ifconfig</code> to determine the machine’s IP address. This is usually listed
under <code class="language-plaintext highlighter-rouge">en0</code> or <code class="language-plaintext highlighter-rouge">eth0</code>. With this information, we can point our iPhone at the
proxy to start capturing requests. On the iOS device, go to Settings &gt; WiFi and
click the blue info circle next to the current WiFi connection. Scroll all the
way to the bottom and click “Configure Proxy”. Select “Manual” and then input
the IP address with port 8080.</p>

<div class="img-with-caption">
  <img src="/assets/img/2024-09-30/iOS-proxy-config.png" alt="iOS manual proxy config" class="img-small" />
  <div class="img-caption">iOS manual proxy configuration</div>
</div>

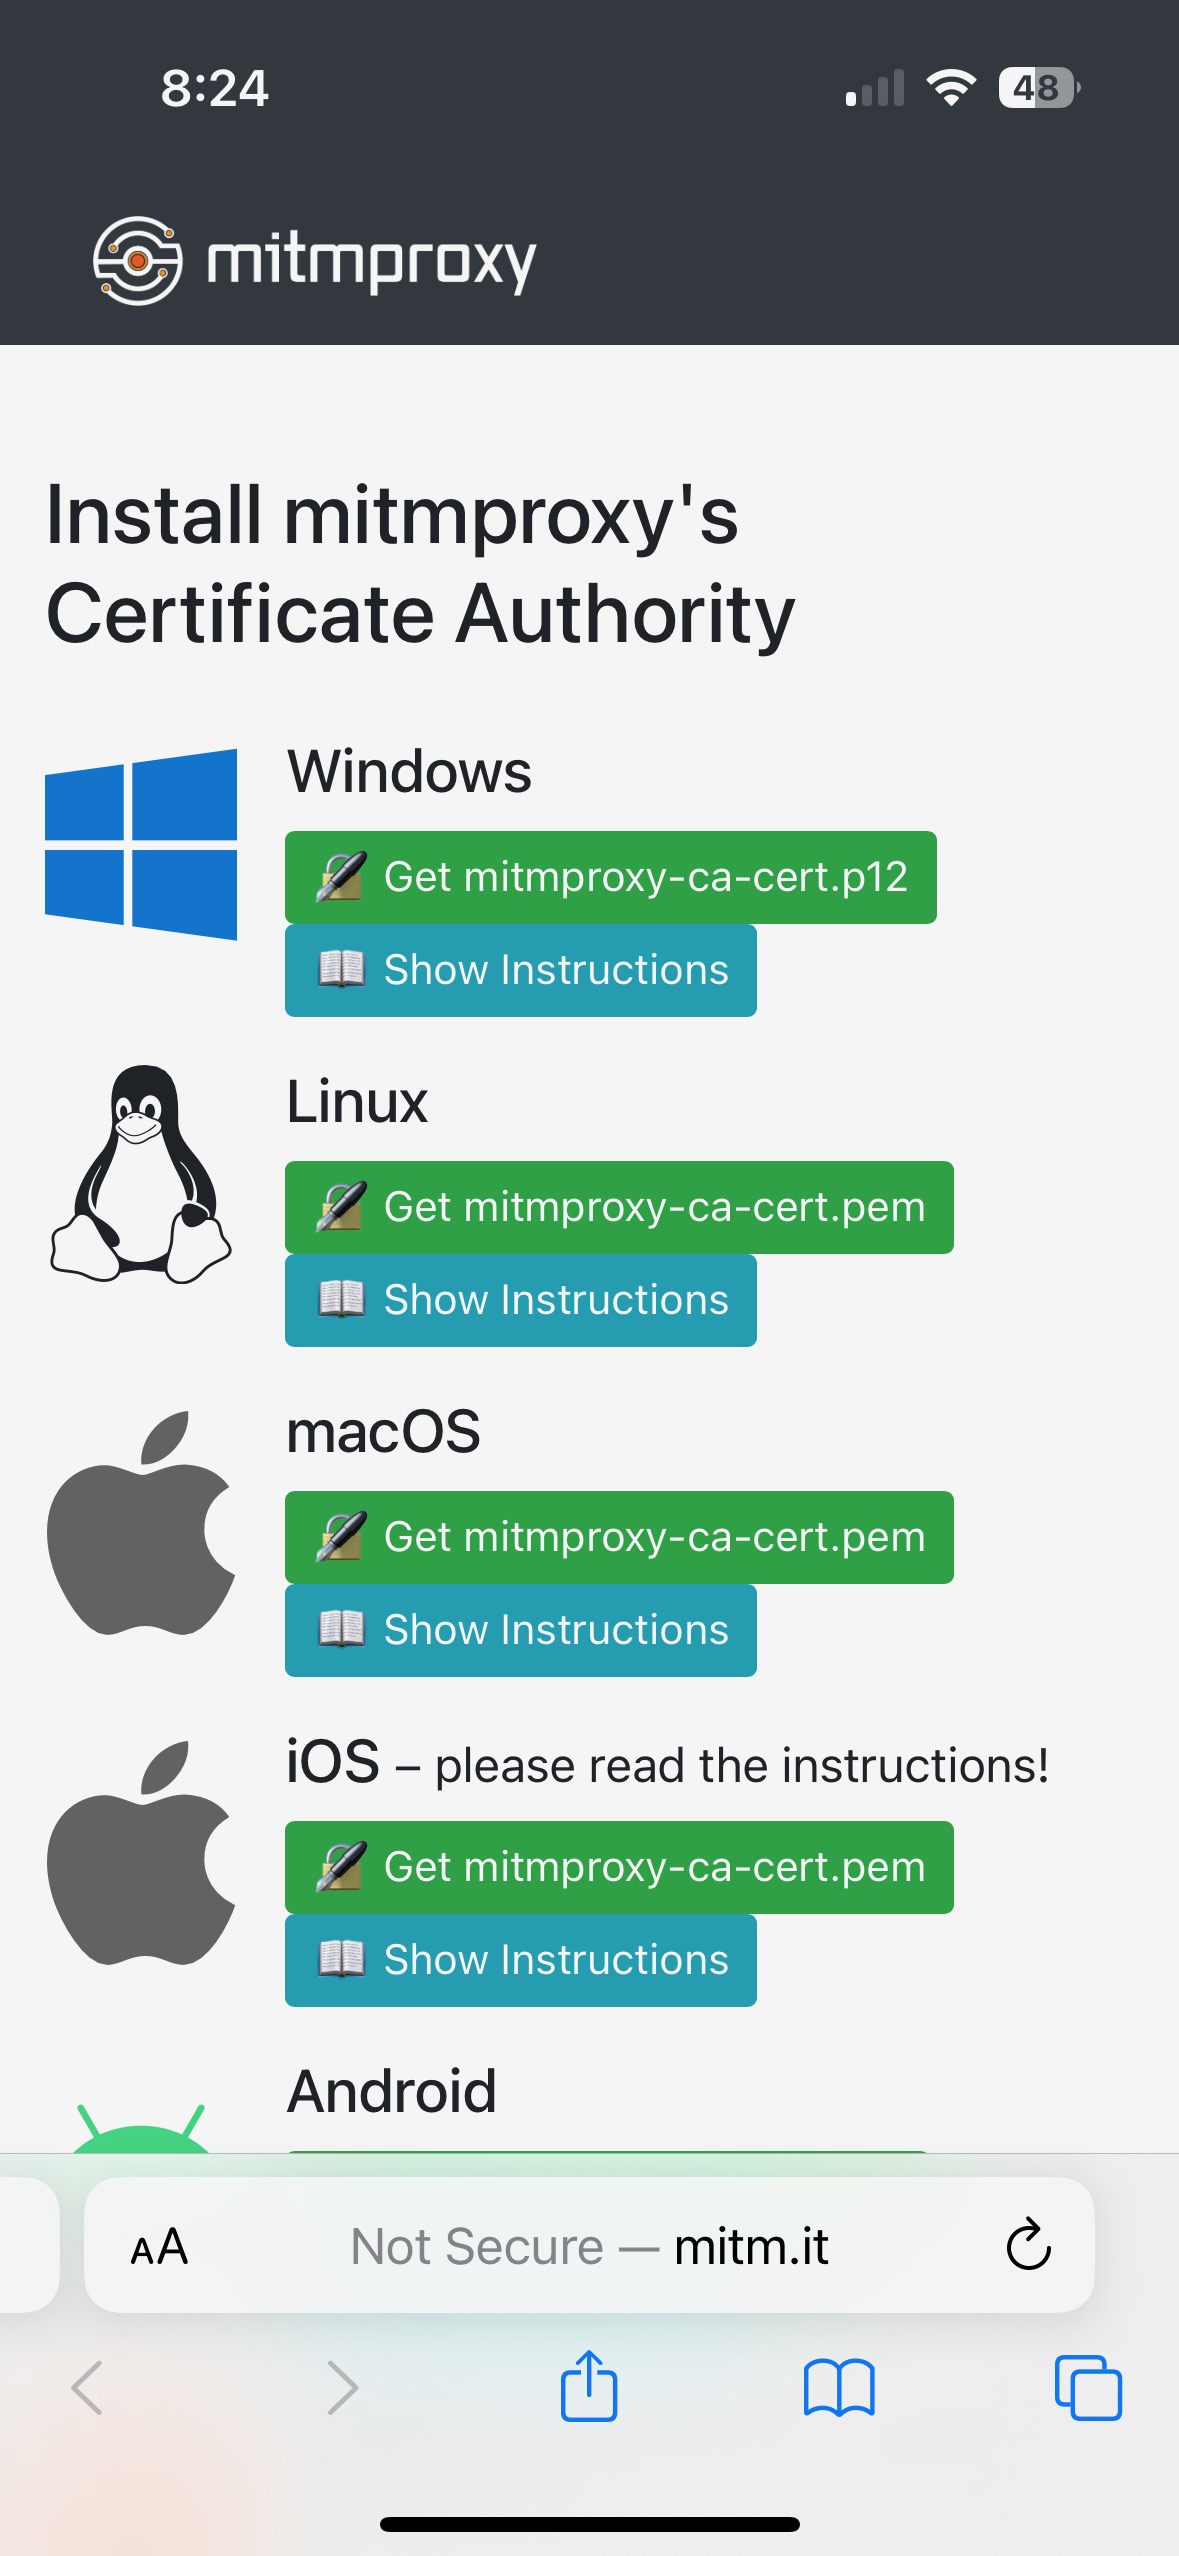
<p>The traffic we’re interested in is likely HTTPS, so we need to complete one more
step by trusting the mitmproxy CA. Navigate to <a href="http://mitm.it">mitm.it</a> on your
iPhone and you should see the following page:</p>

<div class="img-with-caption">
  <img src="/assets/img/2024-09-30/iOS-mitm-cert-page.jpeg" alt="iOS web page with mitm cert for download" class="img-small" />
  <div class="img-caption">iOS web page with mitm cert for download</div>
</div>

<p>After downloading the file, we must install it and enable full trust. Go back to
Settings &gt; General &gt; VPN &amp; Device Management &gt; mitmproxy. Click “install” in the
upper right-hand corner. Now navigate to Settings &gt; About &gt; Certificate Trust
Settings all the way at the bottom. Enable full trust for the mitmproxy
certificate.</p>

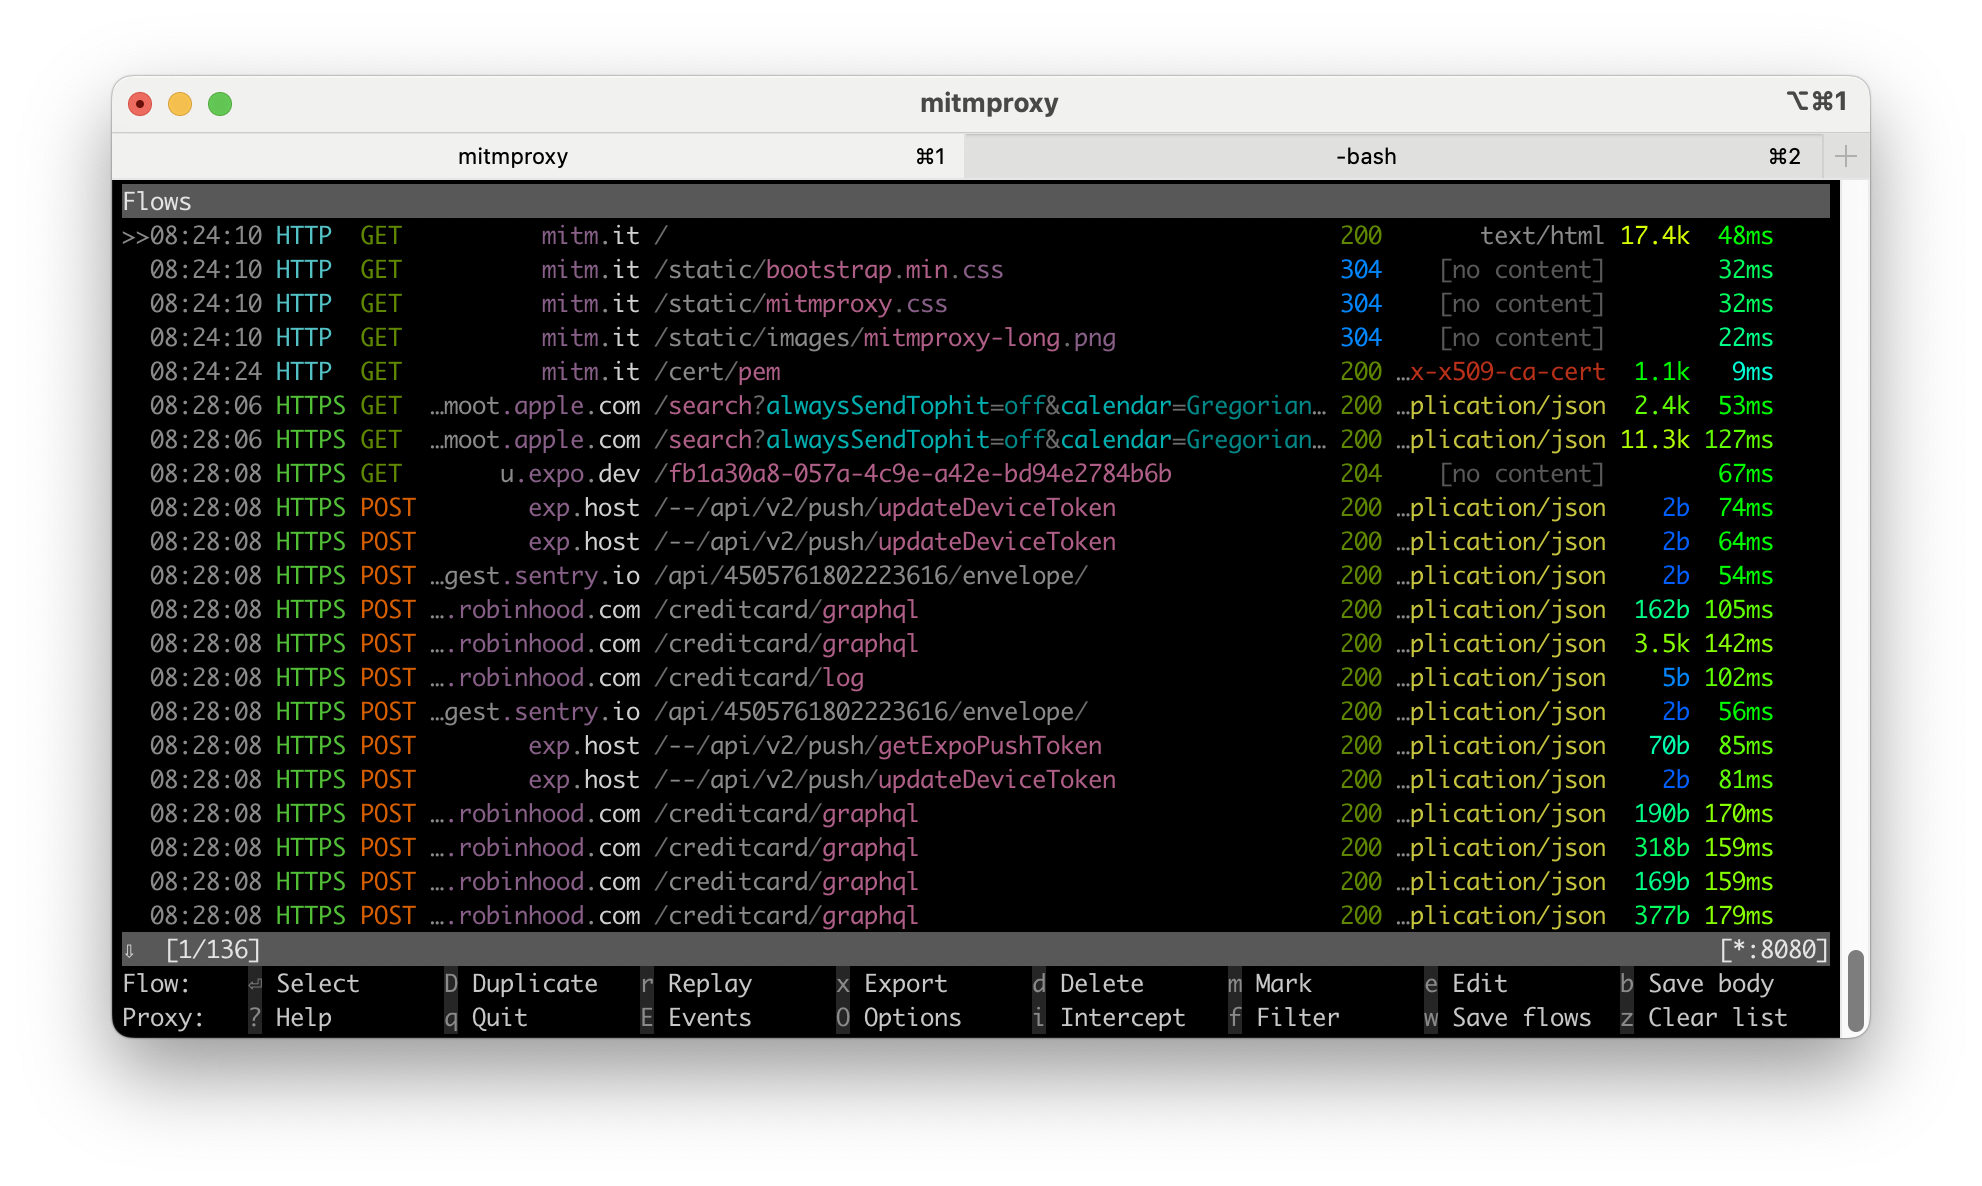
<p>If everything is working correctly, mitmproxy will start to show network
requests from your iPhone. Here is what my console looks like from installing
the mitmproxy CA and opening the credit card app:</p>

<div class="img-with-caption">
  <img src="/assets/img/2024-09-30/mitmproxy-with-requests.png" alt="mitmproxy running with requests" class="img-large" />
  <div class="img-caption">mitmproxy running with requests</div>
</div>

<p>At this point, we can see we are working with a <a href="https://graphql.org/">GraphQL</a>
API. Explore this interface for a bit, and you will eventually find the request
responsible for fetching transactions. You can immediately filter down to these
by pressing <strong>F</strong> and typing <code class="language-plaintext highlighter-rouge">~b transaction</code>. This returns all requests with
“transaction” in the body. Press enter to see the details on a given request.
There are some headers that appear important:</p>

<div class="language-plaintext highlighter-rouge"><div class="highlight"><pre class="highlight"><code>content-type:     application/json
authorization:    Bearer eyJhb...
user-agent:       rhcardapp/1.35.0 CFNetwork/1498.700.2 Darwin/23.6.0
x-x1-client:      mobile-app-rh@1.35.0
</code></pre></div></div>

<p>And the GraphQL query:</p>

<div class="language-sh highlighter-rouge"><div class="highlight"><pre class="highlight"><code><span class="o">{</span>
  <span class="s2">"query"</span>: <span class="s2">"..."</span>,
  <span class="s2">"operationName"</span>: <span class="s2">"TransactionListQuery"</span>,
  <span class="s2">"variables"</span>: <span class="o">{</span>
    <span class="s2">"q"</span>: <span class="o">{</span>
      <span class="s2">"creditCustomerId"</span>: <span class="s2">"aSecretIDontWantToShareWithYou :)"</span>,
      <span class="s2">"filters"</span>: <span class="o">{</span>
        <span class="s2">"values"</span>: <span class="o">[]</span>
      <span class="o">}</span>,
      <span class="s2">"sortDetails"</span>: <span class="o">{</span>
        <span class="s2">"field"</span>: <span class="s2">"TIME"</span>,
        <span class="s2">"ascending"</span>: <span class="nb">false</span>
      <span class="o">}</span>,
      <span class="s2">"limit"</span>: 40
    <span class="o">}</span>
  <span class="o">}</span>
<span class="o">}</span>
<span class="nt">---</span>
query TransactionListQuery<span class="o">(</span>
  <span class="nv">$q</span>: TransactionSearchRequest!
<span class="o">)</span> <span class="o">{</span>
  transactionSearch<span class="o">(</span>q: <span class="nv">$q</span><span class="o">)</span> <span class="o">{</span>
    items <span class="o">{</span>
      <span class="nb">id
      </span>amountMicro
      transactionAt
      merchantDetails <span class="o">{</span>
        merchantName
      <span class="o">}</span>
    <span class="o">}</span>
  <span class="o">}</span>
<span class="o">}</span>
</code></pre></div></div>

<p>With all this information, we can finally start to write our Python script.
Let’s replay the same request to confirm things are working:</p>

<div class="language-py highlighter-rouge"><div class="highlight"><pre class="highlight"><code><span class="kn">import</span> <span class="nn">requests</span>

<span class="n">GRAPHQL_ENDPOINT</span> <span class="o">=</span> <span class="s">"https://api.robinhood.com/creditcard/graphql"</span>
<span class="n">query</span> <span class="o">=</span> <span class="s">"""
    query TransactionListQuery(
        $q: TransactionSearchRequest!
    ) {
        transactionSearch(q: $q) {
            items {
                id
                amountMicro
                transactionAt
                merchantDetails {
                    merchantName
                }
            }
        }
    }
"""</span>
<span class="n">headers</span> <span class="o">=</span> <span class="p">{</span>
    <span class="s">"Content-Type"</span><span class="p">:</span> <span class="s">"application/json"</span><span class="p">,</span>
    <span class="s">"Authorization"</span><span class="p">:</span> <span class="sa">f</span><span class="s">"Bearer </span><span class="si">{</span><span class="n">auth_token</span><span class="si">}</span><span class="s">"</span><span class="p">,</span>
    <span class="s">"User-Agent"</span><span class="p">:</span> <span class="s">"rhcardapp/1.35.0 CFNetwork/1498.700.2 Darwin/23.6.0"</span><span class="p">,</span>
    <span class="s">"x-x1-client"</span><span class="p">:</span> <span class="s">"mobile-app-rh@1.35.0"</span><span class="p">,</span>
<span class="p">}</span>
<span class="n">body</span> <span class="o">=</span> <span class="p">{</span>
    <span class="s">"query"</span><span class="p">:</span> <span class="n">query</span><span class="p">,</span>
    <span class="s">"variables"</span><span class="p">:</span> <span class="p">{</span>
        <span class="s">"q"</span><span class="p">:</span> <span class="p">{</span>
            <span class="s">"creditCustomerId"</span><span class="p">:</span> <span class="n">customer_id</span><span class="p">,</span>
            <span class="s">"filters"</span><span class="p">:</span> <span class="p">{</span><span class="s">"values"</span><span class="p">:</span> <span class="p">[]},</span>
            <span class="s">"sortDetails"</span><span class="p">:</span> <span class="p">{</span><span class="s">"field"</span><span class="p">:</span> <span class="s">"TIME"</span><span class="p">,</span> <span class="s">"ascending"</span><span class="p">:</span> <span class="bp">False</span><span class="p">},</span>
            <span class="s">"limit"</span><span class="p">:</span> <span class="mi">40</span><span class="p">,</span>
        <span class="p">}</span>
    <span class="p">},</span>
    <span class="s">"operationName"</span><span class="p">:</span> <span class="s">"TransactionListQuery"</span><span class="p">,</span>
<span class="p">}</span>
<span class="n">response</span> <span class="o">=</span> <span class="n">requests</span><span class="p">.</span><span class="n">post</span><span class="p">(</span><span class="n">GRAPHQL_ENDPOINT</span><span class="p">,</span> <span class="n">json</span><span class="o">=</span><span class="n">body</span><span class="p">,</span> <span class="n">headers</span><span class="o">=</span><span class="n">headers</span><span class="p">)</span>
<span class="n">results</span> <span class="o">=</span> <span class="n">response</span><span class="p">.</span><span class="n">json</span><span class="p">()</span>
</code></pre></div></div>

<p>Now that we have our transactions, we can parse the data into a <code class="language-plaintext highlighter-rouge">Transaction</code>
dataclass. This class can then be used to output any file format. Here, I used
the <a href="https://github.com/isaacharrisholt/quiffen">Quiffen</a> package to generate a
QIF file:</p>

<div class="language-py highlighter-rouge"><div class="highlight"><pre class="highlight"><code><span class="kn">from</span> <span class="nn">dataclasses</span> <span class="kn">import</span> <span class="n">dataclass</span>
<span class="kn">from</span> <span class="nn">datetime</span> <span class="kn">import</span> <span class="n">datetime</span>
<span class="kn">from</span> <span class="nn">decimal</span> <span class="kn">import</span> <span class="n">Decimal</span>

<span class="kn">import</span> <span class="nn">quiffen</span>

<span class="o">@</span><span class="n">dataclass</span>
<span class="k">class</span> <span class="nc">Transaction</span><span class="p">:</span>
    <span class="n">timestamp</span><span class="p">:</span> <span class="n">datetime</span>
    <span class="n">amount</span><span class="p">:</span> <span class="n">Decimal</span>
    <span class="n">merchant</span><span class="p">:</span> <span class="nb">str</span>

<span class="n">qif</span> <span class="o">=</span> <span class="n">quiffen</span><span class="p">.</span><span class="n">Qif</span><span class="p">()</span>
<span class="n">acc</span> <span class="o">=</span> <span class="n">quiffen</span><span class="p">.</span><span class="n">Account</span><span class="p">(</span><span class="n">name</span><span class="o">=</span><span class="s">"RH Gold"</span><span class="p">,</span> <span class="n">desc</span><span class="o">=</span><span class="s">"RH Gold credit card"</span><span class="p">)</span>
<span class="n">qif</span><span class="p">.</span><span class="n">add_account</span><span class="p">(</span><span class="n">acc</span><span class="p">)</span>

<span class="k">for</span> <span class="n">transaction</span> <span class="ow">in</span> <span class="n">transactions</span><span class="p">:</span>
    <span class="n">qif_transaction</span> <span class="o">=</span> <span class="n">quiffen</span><span class="p">.</span><span class="n">Transaction</span><span class="p">(</span>
        <span class="n">date</span><span class="o">=</span><span class="n">transaction</span><span class="p">.</span><span class="n">timestamp</span><span class="p">,</span>
        <span class="n">amount</span><span class="o">=</span><span class="n">transaction</span><span class="p">.</span><span class="n">amount</span><span class="p">,</span>
        <span class="n">payee</span><span class="o">=</span><span class="n">transaction</span><span class="p">.</span><span class="n">merchant</span><span class="p">,</span>
    <span class="p">)</span>
    <span class="n">acc</span><span class="p">.</span><span class="n">add_transaction</span><span class="p">(</span><span class="n">qif_transaction</span><span class="p">,</span> <span class="n">header</span><span class="o">=</span><span class="n">quiffen</span><span class="p">.</span><span class="n">AccountType</span><span class="p">.</span><span class="n">CREDIT_CARD</span><span class="p">)</span>

<span class="n">qif</span><span class="p">.</span><span class="n">to_qif</span><span class="p">(</span><span class="s">"./rh-cc-transactions.qif"</span><span class="p">)</span>
</code></pre></div></div>

<p>To turn this into a general tool anyone can use, we repeat the same process to
obtain the authorization token and the customer id. That’s it! If you would like
to use this tool yourself, the
<a href="https://github.com/markberger/rh-cc-exporter/">Github repo</a> contains complete
instructions.</p>

<h1 id="resources">Resources:</h1>

<ul>
  <li><a href="https://mitmproxy.org/">mitmproxy</a></li>
  <li><a href="https://github.com/jmfernandes/robin_stocks">robin_stocks</a> - Unofficial
Robinhood library for Python</li>
</ul>]]></content><author><name>Mark J. Berger</name></author><summary type="html"><![CDATA[See the rh-cc-exporter Github repo for all code mentioned in this post.]]></summary><media:thumbnail xmlns:media="http://search.yahoo.com/mrss/" url="https://www.markjberger.com/2024-09-30/mitmproxy-blank.png" /><media:content medium="image" url="https://www.markjberger.com/2024-09-30/mitmproxy-blank.png" xmlns:media="http://search.yahoo.com/mrss/" /></entry><entry><title type="html">Testing Web Apps in Go</title><link href="https://www.markjberger.com/testing-web-apps-in-golang/" rel="alternate" type="text/html" title="Testing Web Apps in Go" /><published>2014-08-23T18:59:23+00:00</published><updated>2014-08-23T18:59:23+00:00</updated><id>https://www.markjberger.com/testing-web-apps-in-golang</id><content type="html" xml:base="https://www.markjberger.com/testing-web-apps-in-golang/"><![CDATA[<p>I’ve been playing around with Go in my spare time by writing a toy web app. The Go standard library has some great packages around writing web applications and I’ve really enjoyed using them. In fact, the official language wiki includes a small tutorial on <a href="https://golang.org/doc/articles/wiki/">writing web apps</a>. However, there is no mention of how to test web apps using the standard library, and searching for any answer doesn’t seem to turn up any great results.</p>

<p>Just toying around with my own personal project, I’ve found that the key to testing web apps in Go is to use dependency injection with high-order functions.</p>

<h3 id="dependency-injection">Dependency Injection</h3>

<p><a href="http://en.wikipedia.org/wiki/Dependency_injection">Dependency injection</a> means that we want to supply everything our function requires to accomplish its goal. We don’t want to rely on any global state or outside services.</p>

<p>However, its unclear how to do this at first. Most tutorials start out having you write applications like this:</p>

<div class="language-go highlighter-rouge"><div class="highlight"><pre class="highlight"><code><span class="k">package</span> <span class="n">main</span>

<span class="k">import</span> <span class="p">(</span>
    <span class="s">"fmt"</span>
    <span class="s">"net/http"</span>
<span class="p">)</span>

<span class="k">func</span> <span class="n">handler</span><span class="p">(</span><span class="n">w</span> <span class="n">http</span><span class="o">.</span><span class="n">ResponseWriter</span><span class="p">,</span> <span class="n">r</span> <span class="o">*</span><span class="n">http</span><span class="o">.</span><span class="n">Request</span><span class="p">)</span> <span class="p">{</span>
    <span class="n">fmt</span><span class="o">.</span><span class="n">Fprintf</span><span class="p">(</span><span class="n">w</span><span class="p">,</span> <span class="s">"Hi there, I love %s!"</span><span class="p">,</span> <span class="n">r</span><span class="o">.</span><span class="n">URL</span><span class="o">.</span><span class="n">Path</span><span class="p">[</span><span class="m">1</span><span class="o">:</span><span class="p">])</span>
<span class="p">}</span>

<span class="k">func</span> <span class="n">main</span><span class="p">()</span> <span class="p">{</span>
    <span class="n">http</span><span class="o">.</span><span class="n">HandleFunc</span><span class="p">(</span><span class="s">"/"</span><span class="p">,</span> <span class="n">handler</span><span class="p">)</span>
    <span class="n">http</span><span class="o">.</span><span class="n">ListenAndServe</span><span class="p">(</span><span class="s">":8080"</span><span class="p">,</span> <span class="no">nil</span><span class="p">)</span>
<span class="p">}</span>
</code></pre></div></div>
<p><em>Source: <a href="https://golang.org/doc/articles/wiki/">Writing Web Applications</a> - Golang Wiki</em></p>

<p>This isn’t a bad approach, but what happens when we want to add a database? Or an outside package to handle our sessions, such as <a href="http://www.gorillatoolkit.org/pkg/sessions">Gorilla Session</a>? Oftentimes people will instantiate a database manager or a session handler globally and call it a day. But that will cause you difficulty when you try to test your handler. It is better to write a function which will generate your handler for you.</p>

<div class="language-go highlighter-rouge"><div class="highlight"><pre class="highlight"><code><span class="k">package</span> <span class="n">main</span>

<span class="k">import</span> <span class="p">(</span>
    <span class="s">"fmt"</span>
    <span class="s">"net/http"</span>
    <span class="s">"github.com/markberger/database"</span>
<span class="p">)</span>

<span class="k">type</span> <span class="n">AppDatabase</span> <span class="k">interface</span> <span class="p">{</span>
    <span class="n">GetBacon</span><span class="p">()</span> <span class="kt">string</span>
<span class="p">}</span>

<span class="k">func</span> <span class="n">homeHandler</span><span class="p">(</span><span class="n">db</span> <span class="n">AppDatabase</span><span class="p">)</span> <span class="n">http</span><span class="o">.</span><span class="n">Handler</span> <span class="p">{</span>
    <span class="k">return</span> <span class="n">http</span><span class="o">.</span><span class="n">HandlerFunc</span><span class="p">(</span><span class="k">func</span><span class="p">(</span><span class="n">w</span> <span class="n">http</span><span class="o">.</span><span class="n">ResponseWriter</span><span class="p">,</span> <span class="n">r</span> <span class="o">*</span><span class="n">http</span><span class="o">.</span><span class="n">Request</span><span class="p">)</span> <span class="p">{</span>
        <span class="n">fmt</span><span class="o">.</span><span class="n">Fprintf</span><span class="p">(</span><span class="n">w</span><span class="p">,</span> <span class="s">"Hi there, I love %s!"</span><span class="p">,</span> <span class="n">db</span><span class="o">.</span><span class="n">GetBacon</span><span class="p">())</span>
    <span class="p">})</span>
<span class="p">}</span>

<span class="k">func</span> <span class="n">main</span><span class="p">()</span> <span class="p">{</span>
    <span class="n">db</span> <span class="o">:=</span> <span class="n">database</span><span class="o">.</span><span class="n">NewDatabase</span><span class="p">()</span>
    <span class="n">http</span><span class="o">.</span><span class="n">HandleFunc</span><span class="p">(</span><span class="s">"/"</span><span class="p">,</span> <span class="n">homeHandler</span><span class="p">(</span><span class="n">db</span><span class="p">))</span>
    <span class="n">http</span><span class="o">.</span><span class="n">ListenAndServe</span><span class="p">(</span><span class="s">":8080"</span><span class="p">,</span> <span class="no">nil</span><span class="p">)</span>
<span class="p">}</span>
</code></pre></div></div>

<p>This is great, because we no longer have to rely on global variables. Also, this makes mocking a breeze. We simply have to create a mock database that fulfills the interface AppDatabase, which means we only have to implement one function, GetBacon.</p>

<h3 id="testing">Testing</h3>

<p>Now that we have a program, we can start writing tests. The key to testing <code class="language-plaintext highlighter-rouge">http.Handler</code> is to use a <code class="language-plaintext highlighter-rouge">httptest.ResponseRecorder</code> found in the <a href="http://golang.org/pkg/net/http/httptest/">net/http/httptest</a> package.</p>

<div class="language-go highlighter-rouge"><div class="highlight"><pre class="highlight"><code><span class="k">package</span> <span class="n">main</span>

<span class="k">import</span><span class="p">(</span>
    <span class="s">"net/http"</span>
    <span class="s">"net/http/httptest"</span>
    <span class="s">"testing"</span>
<span class="p">)</span>

<span class="k">type</span> <span class="n">MockDd</span> <span class="k">struct</span> <span class="p">{}</span>

<span class="n">function</span> <span class="p">(</span><span class="n">db</span> <span class="n">MockDb</span><span class="p">)</span> <span class="n">GetBacon</span><span class="p">()</span> <span class="p">{</span>
    <span class="k">return</span> <span class="s">"bacon"</span>
<span class="p">}</span>

<span class="n">function</span> <span class="n">TestHome</span><span class="p">(</span><span class="n">t</span> <span class="o">*</span><span class="n">testing</span><span class="o">.</span><span class="n">T</span><span class="p">)</span> <span class="p">{</span>
    <span class="n">mockDb</span> <span class="o">:=</span> <span class="n">MockDb</span><span class="p">{}</span>
    <span class="n">homeHandle</span> <span class="o">:=</span> <span class="n">homeHandler</span><span class="p">(</span><span class="n">mockDb</span><span class="p">)</span>
    <span class="n">req</span><span class="p">,</span> <span class="n">_</span> <span class="o">:=</span> <span class="n">http</span><span class="o">.</span><span class="n">NewRequest</span><span class="p">(</span><span class="s">"GET"</span><span class="p">,</span> <span class="s">""</span><span class="p">,</span> <span class="no">nil</span><span class="p">)</span>
    <span class="n">w</span> <span class="o">:=</span> <span class="n">httptest</span><span class="o">.</span><span class="n">NewRecorder</span><span class="p">()</span>
    <span class="n">homeHandle</span><span class="o">.</span><span class="n">ServeHTTP</span><span class="p">(</span><span class="n">w</span><span class="p">,</span> <span class="n">req</span><span class="p">)</span>
    <span class="k">if</span> <span class="n">w</span><span class="o">.</span><span class="n">Code</span> <span class="o">!=</span> <span class="n">http</span><span class="o">.</span><span class="n">StatusOK</span> <span class="p">{</span>
        <span class="n">t</span><span class="o">.</span><span class="n">Errorf</span><span class="p">(</span><span class="s">"Home page didn't return %v"</span><span class="p">,</span> <span class="n">http</span><span class="o">.</span><span class="n">StatusOK</span><span class="p">)</span>
    <span class="p">}</span>
<span class="p">}</span>
</code></pre></div></div>

<p>Of course, all that boilerplate can get pretty redundant, especially when testing POST requests. Therefore, I’ve been using these functions to test my handlers.</p>

<div class="language-go highlighter-rouge"><div class="highlight"><pre class="highlight"><code><span class="k">package</span> <span class="n">main</span>

<span class="k">import</span> <span class="p">(</span>
    <span class="s">"net/http"</span>
    <span class="s">"net/http/httptest"</span>
    <span class="s">"net/url"</span>
    <span class="s">"testing"</span>
<span class="p">)</span>

<span class="k">type</span> <span class="n">HandleTester</span> <span class="k">func</span><span class="p">(</span>
    <span class="n">method</span> <span class="kt">string</span><span class="p">,</span>
    <span class="n">params</span> <span class="n">url</span><span class="o">.</span><span class="n">Values</span><span class="p">,</span>
<span class="p">)</span> <span class="o">*</span><span class="n">httptest</span><span class="o">.</span><span class="n">ResponseRecorder</span>

<span class="c">// Given the current test runner and an http.Handler, generate a</span>
<span class="c">// HandleTester which will test its given input against the</span>
<span class="c">// handler.</span>

<span class="k">func</span> <span class="n">GenerateHandleTester</span><span class="p">(</span>
    <span class="n">t</span> <span class="o">*</span><span class="n">testing</span><span class="o">.</span><span class="n">T</span><span class="p">,</span>
    <span class="n">handleFunc</span> <span class="n">http</span><span class="o">.</span><span class="n">Handler</span><span class="p">,</span>
<span class="p">)</span> <span class="n">HandleTester</span> <span class="p">{</span>

    <span class="c">// Given a method type ("GET", "POST", etc) and</span>
    <span class="c">// parameters, serve the response against the handler and</span>
    <span class="c">// return the ResponseRecorder.</span>

    <span class="k">return</span> <span class="k">func</span><span class="p">(</span>
        <span class="n">method</span> <span class="kt">string</span><span class="p">,</span>
        <span class="n">params</span> <span class="n">url</span><span class="o">.</span><span class="n">Values</span><span class="p">,</span>
    <span class="p">)</span> <span class="o">*</span><span class="n">httptest</span><span class="o">.</span><span class="n">ResponseRecorder</span> <span class="p">{</span>

        <span class="n">req</span><span class="p">,</span> <span class="n">err</span> <span class="o">:=</span> <span class="n">http</span><span class="o">.</span><span class="n">NewRequest</span><span class="p">(</span>
            <span class="n">method</span><span class="p">,</span>
            <span class="s">""</span><span class="p">,</span>
            <span class="n">strings</span><span class="o">.</span><span class="n">NewReader</span><span class="p">(</span><span class="n">params</span><span class="o">.</span><span class="n">Encode</span><span class="p">()),</span>
        <span class="p">)</span>
        <span class="k">if</span> <span class="n">err</span> <span class="o">!=</span> <span class="no">nil</span> <span class="p">{</span>
            <span class="n">t</span><span class="o">.</span><span class="n">Errorf</span><span class="p">(</span><span class="s">"%v"</span><span class="p">,</span> <span class="n">err</span><span class="p">)</span>
        <span class="p">}</span>
        <span class="n">req</span><span class="o">.</span><span class="n">Header</span><span class="o">.</span><span class="n">Set</span><span class="p">(</span>
            <span class="s">"Content-Type"</span><span class="p">,</span>
            <span class="s">"application/x-www-form-urlencoded; param=value"</span><span class="p">,</span>
        <span class="p">)</span>
        <span class="n">w</span> <span class="o">:=</span> <span class="n">httptest</span><span class="o">.</span><span class="n">NewRecorder</span><span class="p">()</span>
        <span class="n">handleFunc</span><span class="o">.</span><span class="n">ServeHTTP</span><span class="p">(</span><span class="n">w</span><span class="p">,</span> <span class="n">req</span><span class="p">)</span>
        <span class="k">return</span> <span class="n">w</span>
    <span class="p">}</span>
<span class="p">}</span>

<span class="n">function</span> <span class="n">TestHome</span><span class="p">(</span><span class="n">t</span> <span class="o">*</span><span class="n">testing</span><span class="o">.</span><span class="n">T</span><span class="p">)</span> <span class="p">{</span>
    <span class="n">mockDb</span> <span class="o">:=</span> <span class="n">MockDb</span><span class="p">{}</span>
    <span class="n">homeHandle</span> <span class="o">:=</span> <span class="n">homeHandler</span><span class="p">(</span><span class="n">mockDb</span><span class="p">)</span>
    <span class="n">test</span> <span class="o">:=</span> <span class="n">GenerateHandleTester</span><span class="p">(</span><span class="n">t</span><span class="p">,</span> <span class="n">homeHandle</span><span class="p">)</span>
    <span class="n">w</span> <span class="o">:=</span> <span class="n">test</span><span class="p">(</span><span class="s">"GET"</span><span class="p">,</span> <span class="n">url</span><span class="o">.</span><span class="n">Values</span><span class="p">{})</span>
    <span class="k">if</span> <span class="n">w</span><span class="o">.</span><span class="n">Code</span> <span class="o">!=</span> <span class="n">http</span><span class="o">.</span><span class="n">StatusOK</span> <span class="p">{</span>
        <span class="n">t</span><span class="o">.</span><span class="n">Errorf</span><span class="p">(</span><span class="s">"Home page didn't return %v"</span><span class="p">,</span> <span class="n">http</span><span class="o">.</span><span class="n">StatusOK</span><span class="p">)</span>
    <span class="p">}</span>
<span class="p">}</span>
</code></pre></div></div>

<p>For a more thorough example of these methods in action, check out my toy project’s tests <a href="https://github.com/markberger/carton/blob/master/api/auth_test.go">here</a>.</p>

<p>If you have any better methods of testing web apps written in the standard library, feel free to leave a comment or send me email.</p>]]></content><author><name>Mark J. Berger</name></author><summary type="html"><![CDATA[I’ve been playing around with Go in my spare time by writing a toy web app. The Go standard library has some great packages around writing web applications and I’ve really enjoyed using them. In fact, the official language wiki includes a small tutorial on writing web apps. However, there is no mention of how to test web apps using the standard library, and searching for any answer doesn’t seem to turn up any great results.]]></summary><media:thumbnail xmlns:media="http://search.yahoo.com/mrss/" url="https://www.markjberger.com/2014-08-23/cover.jpg" /><media:content medium="image" url="https://www.markjberger.com/2014-08-23/cover.jpg" xmlns:media="http://search.yahoo.com/mrss/" /></entry><entry><title type="html">An Introduction to Chef Solo</title><link href="https://www.markjberger.com/an-introduction-to-chef-solo/" rel="alternate" type="text/html" title="An Introduction to Chef Solo" /><published>2014-08-18T02:11:29+00:00</published><updated>2014-08-18T02:11:29+00:00</updated><id>https://www.markjberger.com/an-introduction-to-chef-solo</id><content type="html" xml:base="https://www.markjberger.com/an-introduction-to-chef-solo/"><![CDATA[<p>This past weekend I was able to automatically provision my personal server using <a href="http://www.getchef.com/chef/">Chef</a>. Chef is a powerful tool for configuring servers, but most of the guides I found were overly complex or aimed at groups with large computer clusters. Therefore this is my attempt at writing a stupid-simple guide to Chef-solo for a small number of personal machines.</p>

<h3 id="why-should-i-use-chef">Why should I use Chef?</h3>

<p>I don’t know any reasons for using Chef specifically, but using a configuration management tool can save you a lot of headaches. If you every break your virtual private server, you can always create a new one and redeploy your software in minutes without going through all of the motions by hand. While it might seem trivial now, you’ll be happy you invested the time six months later when you’ve completely forgotten what you did to get nginx working just right.</p>

<h3 id="assumptions">Assumptions</h3>

<p>I’m assuming you have the following:</p>

<ul>
  <li>A recent version of Ruby</li>
  <li>A recent version of RubyGems</li>
  <li>A linux server</li>
</ul>

<p>If you are looking for a hosting service, I personally recommend <a href="https://www.digitalocean.com/?refcode=58be52a52767">Digital Ocean</a> (referral link).</p>

<h3 id="setup">Setup</h3>
<p>To start, install <a href="http://matschaffer.github.io/knife-solo/">knife-solo</a> and <a href="http://berkshelf.com/">berkshelf</a>.</p>
<div class="language-plaintext highlighter-rouge"><div class="highlight"><pre class="highlight"><code>gem install knife-solo
gem install berkshelf
</code></pre></div></div>

<p>Knife-solo is a tool which adds a few extensions to Chef’s command line tool, knife, to make life easier. Berkshelf is a dependency management tool for Chef cookbooks.</p>

<h3 id="whats-a-cookbook">What’s a cookbook?</h3>

<p>A cookbook is a collection of scripts which focus on configuring a certain aspect of the machine or installing a certain application. So, for example, there are nginx cookbooks which focus on installing and configuring nginx. Each one of the scripts inside a given cookbook is referred to as a recipe in order to further the kitchen analogy.</p>

<h3 id="lets-get-cooking">Let’s get cooking</h3>

<p>Now that we have knife-solo, create a new directory and run the following command:</p>

<div class="language-plaintext highlighter-rouge"><div class="highlight"><pre class="highlight"><code>knife solo init chef_dir/
</code></pre></div></div>

<p>This will give you the following:</p>

<div class="language-plaintext highlighter-rouge"><div class="highlight"><pre class="highlight"><code>chef_dir/
    Berksfile
    cookbooks/
    data_bags/
    environments/
    nodes/
    roles/
    site-cookbooks/
</code></pre></div></div>

<p>You’ll notice that knife-solo has created two cookbook directories: <code class="language-plaintext highlighter-rouge">cookbooks</code> and <code class="language-plaintext highlighter-rouge">site-cookbooks</code>. Site cookbooks are meant for specific server configurations, like our virtual private server, while cookbooks are meant for general use cases, such as installing nginx.</p>

<p>Let’s create a new cookbook for our server.</p>

<div class="language-plaintext highlighter-rouge"><div class="highlight"><pre class="highlight"><code>knife cookbook create -o site-cookbooks/ vps
</code></pre></div></div>

<p>Now you’ll have this:</p>

<div class="language-plaintext highlighter-rouge"><div class="highlight"><pre class="highlight"><code>vps/
    attributes/
    definitions/
    files/
        default/
    libraries/
    providers/
    recipies/
        default.rb
    resources/
    templates/
        default/
    metadata.rb
    README.md
    CHANGELOG.md
</code></pre></div></div>

<p>In this tutorial we are just going to install some packages, configure ssh, and create a new user, so you can ignore most of these directories.</p>

<p>We’re going to be using the <code class="language-plaintext highlighter-rouge">user</code> cookbook and the <code class="language-plaintext highlighter-rouge">openssh</code> cookbook, so add the following lines to your <code class="language-plaintext highlighter-rouge">metadata.rb</code> file.</p>

<div class="language-plaintext highlighter-rouge"><div class="highlight"><pre class="highlight"><code>depends "user"
depends "openssh"
</code></pre></div></div>

<p>This is Chef’s way of knowing which cookbooks to have before attempting to run any of the recipes inside our new cookbook.</p>

<p>Now let’s open up <code class="language-plaintext highlighter-rouge">recipies/default.rb</code> and write our first recipe.</p>

<pre><code class="language-language-ruby">node.packages.each do |pkg|
    package pkg
end

# provision user account
include_recipe 'user::data_bag'

# provision ssh
include_recipe 'openssh'
</code></pre>

<p>First, we iterate over a list of packages and install each one. Then we execute the <code class="language-plaintext highlighter-rouge">data_bag</code> recipe found in the <code class="language-plaintext highlighter-rouge">user</code> cookbook followed by the default recipe for <code class="language-plaintext highlighter-rouge">openssh</code>.</p>

<p>Right now we are using the default settings found in each individual cookbook, and Chef has no idea what packages we want to install. To resolve our unknown variables and change the default settings we need to use the <code class="language-plaintext highlighter-rouge">attributes</code> folder.</p>

<p>Inside <code class="language-plaintext highlighter-rouge">site-cookbooks/vps</code> create <code class="language-plaintext highlighter-rouge">attributes/default.rb</code> and add the following:</p>

<pre><code class="language-language-ruby">default.packages = %w(vim git)

default.users = ['ourUser']
# Don't create an ssh key for us
default.user.ssh_keygen = false

default.openssh.server.permit_root_login = 'no'
default.openssh.server.password_authentication = 'no'
default.openssh.server.allow_groups = 'sudo'
default.openssh.server.port = '27984'
default.openssh.server.login_grace_time = '30'
default.openssh.server.use_p_a_m = 'no'
default.openssh.server.print_motd = 'no'
</code></pre>

<p>Great! Now Chef will install vim and git, create the ourUser account, and lock down ssh for us.</p>

<p>Now we need to tell <code class="language-plaintext highlighter-rouge">user</code> what we want the <code class="language-plaintext highlighter-rouge">ourUser</code> account to look like.</p>

<p>Go to <code class="language-plaintext highlighter-rouge">chef_dir/data_bags/</code> and create a <code class="language-plaintext highlighter-rouge">users</code> directory. Create <code class="language-plaintext highlighter-rouge">ourUser.json</code> inside the <code class="language-plaintext highlighter-rouge">users</code> directory and add the following:</p>

<div class="language-plaintext highlighter-rouge"><div class="highlight"><pre class="highlight"><code>{
    "id": "ourUser",
    "password": "your_password",
    "groups": [
        "sudo"
    ],
    "ssh_keys": [
        "your_public_ssh_key"
    ]
}
</code></pre></div></div>

<p>Note that you need to generate the <code class="language-plaintext highlighter-rouge">"your_password"</code> string using <code class="language-plaintext highlighter-rouge">mkpasswd -m sha-512</code>.</p>

<p>Now we need to create a configuration file for Chef to use. Create a <code class="language-plaintext highlighter-rouge">vps.json</code> inside the <code class="language-plaintext highlighter-rouge">nodes</code> directory and place the following:</p>

<div class="language-plaintext highlighter-rouge"><div class="highlight"><pre class="highlight"><code>{
    "run_list": [
        "recipe[vps]"
    ]
}
</code></pre></div></div>

<p>Finally, we need to add our dependencies to the <code class="language-plaintext highlighter-rouge">Berksfile</code> so that Chef will install them on our linux box before executing our recipe. Your <code class="language-plaintext highlighter-rouge">Berksfile</code> should look like this:</p>

<div class="language-plaintext highlighter-rouge"><div class="highlight"><pre class="highlight"><code>source "https://supermarket.getchef.com"

cookbook 'user'
cookbook 'openssh'
</code></pre></div></div>

<p>That’s it! Now we can finally run Chef on our server.</p>

<div class="language-plaintext highlighter-rouge"><div class="highlight"><pre class="highlight"><code>knife solo bootstrap root@our_server nodes/vps.json
</code></pre></div></div>

<p>This will install Chef on the server, download the cookbooks in the <code class="language-plaintext highlighter-rouge">Berksfile</code>, and execute our default recipe in the <code class="language-plaintext highlighter-rouge">vps</code> cookbook.</p>

<p>Finally, we need to clean up the machine. However, we must login as <code class="language-plaintext highlighter-rouge">ourUser</code> since we’ve prevented root login in our Chef recipe.</p>

<div class="language-plaintext highlighter-rouge"><div class="highlight"><pre class="highlight"><code>knife solo clean ourUser@our_server
</code></pre></div></div>

<p>Hopefully this helped you set up Chef with your linux machine. Chef seems to be easy enough to use from this point once you’re able to somewhat see how all the pieces fit together. This is my first time using Chef so if I’ve made an error or committed some bad practices, please let me know in the comments or feel free to email me.</p>

<p>Also if you’re looking for a Chef cookbook to install <a href="https://github.com/tryghost/Ghost">Ghost</a>, checkout <a href="https://github.com/markberger/ghost-blog">the one I made</a> to deploy this blog using sqlite3.</p>]]></content><author><name>Mark J. Berger</name></author><summary type="html"><![CDATA[This past weekend I was able to automatically provision my personal server using Chef. Chef is a powerful tool for configuring servers, but most of the guides I found were overly complex or aimed at groups with large computer clusters. Therefore this is my attempt at writing a stupid-simple guide to Chef-solo for a small number of personal machines.]]></summary><media:thumbnail xmlns:media="http://search.yahoo.com/mrss/" url="https://www.markjberger.com/2014-08-17/cover.jpg" /><media:content medium="image" url="https://www.markjberger.com/2014-08-17/cover.jpg" xmlns:media="http://search.yahoo.com/mrss/" /></entry><entry><title type="html">Running flask with virtualenv, uwsgi, and nginx</title><link href="https://www.markjberger.com/flask-with-virtualenv-uwsgi-nginx/" rel="alternate" type="text/html" title="Running flask with virtualenv, uwsgi, and nginx" /><published>2013-10-18T05:40:57+00:00</published><updated>2013-10-18T05:40:57+00:00</updated><id>https://www.markjberger.com/flask-with-virtualenv-uwsgi-nginx</id><content type="html" xml:base="https://www.markjberger.com/flask-with-virtualenv-uwsgi-nginx/"><![CDATA[<p>My website used to be hosted on Heroku, but I recently changed to a virtual private server. Figuring out how to serve my flask site with virtualenv, uwsgi, and nginx was frustrating and it almost made me regret switching. There are plenty of articles on this same topic, but none of them worked for me on the first try. Here are my notes for Ubuntu 12.04 in case someone else is experiencing similar issues.</p>

<p>First make sure that your vps has the latest updates:</p>

<div class="language-plaintext highlighter-rouge"><div class="highlight"><pre class="highlight"><code>sudo apt-get update
sudo apt-get upgrade
</code></pre></div></div>

<p>Now install python and virtualenv:</p>

<div class="language-plaintext highlighter-rouge"><div class="highlight"><pre class="highlight"><code>sudo apt-get install build-essential python-dev python-pip
sudo pip install virtualenv
</code></pre></div></div>

<p>Make a folder for your website:</p>

<div class="language-plaintext highlighter-rouge"><div class="highlight"><pre class="highlight"><code>sudo mkdir -p /var/www/mysite
sudo chown -R &lt;your user id&gt; /var/www/mysite
cd /var/www/mysite
</code></pre></div></div>

<p>Setup virtualenv and install flask:</p>

<div class="language-plaintext highlighter-rouge"><div class="highlight"><pre class="highlight"><code>virtualenv .env --no-site-packages
source .env/bin/activate
pip install flask
</code></pre></div></div>

<p>Place your flask app in this folder. Make sure that your host is set to <code class="language-plaintext highlighter-rouge">0.0.0.0</code> and that your app is under <code class="language-plaintext highlighter-rouge">if __name__ == '__main__':</code>. If your app is in a function, uwsgi will not be able to call it.</p>

<p>Now is a good time to test your app with the flask development server to see if everything is working so far. If everything runs smoothly, install nginx and uwsgi:</p>

<div class="language-plaintext highlighter-rouge"><div class="highlight"><pre class="highlight"><code>deactivate
sudo apt-get install nginx uwsgi uwsgi-plugin-python
</code></pre></div></div>

<p>Next we must create a socket file for nginx to communicate with uwsgi:</p>

<div class="language-plaintext highlighter-rouge"><div class="highlight"><pre class="highlight"><code>cd /tmp/
touch mysite.sock
sudo chown www-data mysite.sock
</code></pre></div></div>

<p>By changing the owner of <code class="language-plaintext highlighter-rouge">mysite.sock</code> to <code class="language-plaintext highlighter-rouge">www-data</code>, nginx will be able to write to the socket. Now all we have to do is add our configuration files for nginx and uwsgi. First delete the default configuration for nginx:</p>

<div class="language-plaintext highlighter-rouge"><div class="highlight"><pre class="highlight"><code>cd /etc/nginx/sites-available
sudo rm default
</code></pre></div></div>

<p>Create a new configuration file <code class="language-plaintext highlighter-rouge">mysite</code> and add the following:</p>

<div class="language-plaintext highlighter-rouge"><div class="highlight"><pre class="highlight"><code>server {
    listen 80;
    server_tokens off;
    server_name www.mysite.com mysite.com;

     location / {
         include uwsgi_params;
         uwsgi_pass unix:/tmp/mysite.sock;
     }

     location /static {
         alias /var/www/mysite/static;
     }

     ## Only requests to our Host are allowed
     if ($host !~ ^(mysite.com|www.mysite.com)$ ) {
        return 444;
     }
}
</code></pre></div></div>

<p>In order to enable the site, we must link our configuration file to <code class="language-plaintext highlighter-rouge">/etc/nginx/sites-enabled/</code>:</p>

<div class="language-plaintext highlighter-rouge"><div class="highlight"><pre class="highlight"><code>sudo ln -s /etc/nginx/sites-available/mysite /etc/nginx/sites-enabled/mysite
</code></pre></div></div>

<p>The process is similar for uwsgi. Create the file <code class="language-plaintext highlighter-rouge">/etc/uwsgi/apps-available/mysite.ini</code> and add the following:</p>

<div class="language-plaintext highlighter-rouge"><div class="highlight"><pre class="highlight"><code>[uwsgi]
vhost = true
socket = /tmp/mysite.sock
venv = /var/www/mysite/.env
chdir = /var/www/mysite
module = app
callable = app
</code></pre></div></div>

<p>Module is the name of your python script and callable is the name of your flask instance. So if your flask site was in a file called <code class="language-plaintext highlighter-rouge">mysite.py</code> that looked like this:</p>

<div class="language-plaintext highlighter-rouge"><div class="highlight"><pre class="highlight"><code>from flask import Flask
my_app = Flask(__name__)

@my_app.route('/')
def hello_world():
    return 'Hello World!'

if __name__ == '__main__':
    my_app.run(host='0.0.0.0')
</code></pre></div></div>

<p>Your mysite.ini file would be:</p>

<div class="language-plaintext highlighter-rouge"><div class="highlight"><pre class="highlight"><code>module = mysite
callable = my_app
</code></pre></div></div>

<p>Link the configuration file to the enabled-apps folder:</p>

<div class="language-plaintext highlighter-rouge"><div class="highlight"><pre class="highlight"><code>sudo ln -s /etc/uwsgi/apps-available/mysite.ini /etc/uwsgi/apps-enabled/mysite.ini
</code></pre></div></div>

<p>Finally, restart nginx and uwsgi:</p>

<div class="language-plaintext highlighter-rouge"><div class="highlight"><pre class="highlight"><code>sudo service nginx restart
sudo service uwsgi restart
</code></pre></div></div>

<p>Thats it. If you notice any errors in my guide, please feel free to email me. Here are some tips in case you get stuck:</p>

<ul>
  <li>Check that your flask site runs under virtualenv without any errors.</li>
  <li>Ensure that you can run your site with just uwsgi from the command line.</li>
  <li>If you run uwsgi with sudo you will change the owner of <code class="language-plaintext highlighter-rouge">mysite.sock</code> to root and this will create errors for nginx. Make sure that you change the owner back to <code class="language-plaintext highlighter-rouge">www-data</code>.</li>
  <li>If uwsgi cannot find your app, you probably have an issue with file permissions. In order to serve the site uwsgi must have executable permissions for your python script and your .env folder.</li>
  <li>The logs for nginx and uwsgi are <code class="language-plaintext highlighter-rouge">/var/log/nginx/error.log</code> and <code class="language-plaintext highlighter-rouge">/var/log/uwsgi/app/mysite.log</code> respectively. If nginx is working properly, you will want to look at <code class="language-plaintext highlighter-rouge">/var/log/nginx/access.log</code>.</li>
</ul>]]></content><author><name>Mark J. Berger</name></author><summary type="html"><![CDATA[My website used to be hosted on Heroku, but I recently changed to a virtual private server. Figuring out how to serve my flask site with virtualenv, uwsgi, and nginx was frustrating and it almost made me regret switching. There are plenty of articles on this same topic, but none of them worked for me on the first try. Here are my notes for Ubuntu 12.04 in case someone else is experiencing similar issues.]]></summary></entry><entry><title type="html">Git Tips for Beginners</title><link href="https://www.markjberger.com/git-tips-for-beginners/" rel="alternate" type="text/html" title="Git Tips for Beginners" /><published>2013-10-18T05:02:11+00:00</published><updated>2013-10-18T05:02:11+00:00</updated><id>https://www.markjberger.com/git-tips-for-beginners</id><content type="html" xml:base="https://www.markjberger.com/git-tips-for-beginners/"><![CDATA[<p>As I’m nearing the end of the Google Summer of Code (GSoC) program with the
<a href="https://tahoe-lafs.org/trac/tahoe-lafs">Tahoe-LAFS community</a>, I can say it has
been an amazing learning experience. I learned a lot and was able to solve some
important bugs along the way.</p>

<p>As with any learning experience, there were plenty of frustrations along the
way. Sadly, most of these frustration were caused by git and not the problems I
was trying to solve. Before Summer of Code, I had only used git for personal
projects and my knowledge was limited. The learning curve for git is extremely
high, and it can be discouraging to spend half of your time fighting with git
instead of hacking on your project. Additionally, there are some conventions
beginners are not aware of when they start working on an open source project.
Here are some of the things I wish I knew before I started hacking on
Tahoe-LAFS.</p>

<h3 id="clone-with-ssh">Clone with SSH</h3>

<p>If you fork a repository on Github, clone the repository with the <code class="language-plaintext highlighter-rouge">ssh</code> link.
Otherwise, you will have to authenticate with Github each time you push a
branch. For information on authenticating with Github via ssh keys, check out
<a href="https://help.github.com/articles/generating-ssh-keys">Github’s detailed guide</a>.</p>

<h3 id="never-work-on-master">Never Work on Master</h3>

<p>One of the most important rules to remember is: never commit to the master
branch. Master is pristine and can only be touched after multiple people have
signed off on the code. Since we cannot commit code to master, all work must be
done on a branch, which can be thought of as another copy of the code base. In
order to create a branch based on master, use:</p>

<div class="language-plaintext highlighter-rouge"><div class="highlight"><pre class="highlight"><code>git branch &lt;your_branch_name&gt; master
</code></pre></div></div>

<p>Or if you are currently on master:</p>

<div class="language-plaintext highlighter-rouge"><div class="highlight"><pre class="highlight"><code>git branch &lt;your_branch_name&gt;
</code></pre></div></div>

<p>Or if you want to create a branch and check it out in the same command:</p>

<div class="language-plaintext highlighter-rouge"><div class="highlight"><pre class="highlight"><code>git checkout -b &lt;your_branch_name&gt;
</code></pre></div></div>

<h3 id="updating-master-to-reflect-upstream">Updating Master to Reflect Upstream</h3>

<p>Since git is a decentralized version control system, there is no obvious way to
sync your master branch with the project’s master branch. To do this, we first
need to add a new remote to the project’s main repository.</p>

<div class="language-plaintext highlighter-rouge"><div class="highlight"><pre class="highlight"><code>git remote add upstream &lt;link_to_main_repo&gt;
</code></pre></div></div>

<p>Now we need to retrieve information about this new remote repository.</p>

<div class="language-plaintext highlighter-rouge"><div class="highlight"><pre class="highlight"><code>git fetch upstream
</code></pre></div></div>

<p>Finally, we can update the local master branch to reflect upstream’s master
branch.</p>

<div class="language-plaintext highlighter-rouge"><div class="highlight"><pre class="highlight"><code>git checkout master
git merge upstream/master
</code></pre></div></div>

<p>Now our master branch is identical to the master branch on upstream.</p>

<p><strong>Edit:</strong> In general, you shouldn’t have to worry about writing your patch on
the latest version of upstream. Anyone who can commit to the project’s master
branch should be able to merge your branch if it is based on a recent version of
upstream. Thanks to <a href="http://59a2.org/research/">Jed Brown</a> for suggesting this
change.</p>

<h3 id="fixing-commits">Fixing Commits</h3>

<p>Oh no! After you committed that awesome patch, you noticed that you made a
spelling mistake in your code. Even worse, there is also a spelling mistake in
your commit message. Thankfully, both of these errors can easily be fixed. To
fix the commit message, use:</p>

<div class="language-plaintext highlighter-rouge"><div class="highlight"><pre class="highlight"><code>git commit --amend
</code></pre></div></div>

<p>This will bring up the previous commit message. Fix the spelling mistake, save,
and exit to recommit the patch.</p>

<p>Now to fix the spelling error in the patch. Fix the spelling error and make an
additional commit. Don’t worry about the commit message. Then type
<code class="language-plaintext highlighter-rouge">git rebase -i HEAD~2</code>:</p>

<div class="language-plaintext highlighter-rouge"><div class="highlight"><pre class="highlight"><code>pick 40e4369 My sweet bug-busting commit
pick ec48bcf My spelling fix
...
# Commands:
#  p, pick = use commit
#  r, reword = use commit, but edit the commit message
#  e, edit = use commit, but stop for amending
#  s, squash = use commit, but meld into previous commit
#  f, fixup = like "squash", but discard this commit's log message
#  x, exec = run command (the rest of the line) using shell
</code></pre></div></div>

<p><code class="language-plaintext highlighter-rouge">HEAD~2</code> means we want to rebase the two commits before our current position.
Rebase is a powerful tool, and a proper explanation is outside the scope of this
post. But, for our fix we want to use <code class="language-plaintext highlighter-rouge">fixup</code> on <code class="language-plaintext highlighter-rouge">ec48bcf</code>.</p>

<div class="language-plaintext highlighter-rouge"><div class="highlight"><pre class="highlight"><code>pick 40e4369 My sweet bug-busting commit
f    ec48bcf My spelling fix
</code></pre></div></div>

<p>Save and exit. Now a simple mistake is not breaking an otherwise useful commit.
It’s important to note, that if the branch has already been pushed to Github,
you will have to do a forced push to sync the branch.</p>

<div class="language-plaintext highlighter-rouge"><div class="highlight"><pre class="highlight"><code>git push -f origin &lt;my_branch&gt;
</code></pre></div></div>

<p>As a rule of thumb, if someone else is using your branch in any capacity, you
should not force push the branch. Instead of rebasing to combine commits, leave
the separate commit as is.</p>

<h3 id="check-for-trailing-whitespace">Check for Trailing Whitespace</h3>

<p>This doesn’t have to do with git, but it is still worth knowing. Before making
any commits, it’s good practice to run <code class="language-plaintext highlighter-rouge">git diff</code> to ensure you aren’t
accidently committing any debug code. Additionally, check for any newlines,
tabs, or spaces you may have added by accident, especially trailing whitespace.
While trailing whitespace isn’t the end of the world,
<a href="http://programmers.stackexchange.com/questions/121555/why-is-trailing-whitespace-a-big-deal">it annoys a lot of people</a>.
If you use Sublime Text, I recommend the
<a href="https://github.com/SublimeText/TrailingSpaces">Trailing Spaces</a> plugin.</p>

<p>Thanks for reading!</p>

<p><em>9/10/13: The initial version of this post refered to upstream as trunk.</em></p>]]></content><author><name>Mark J. Berger</name></author><summary type="html"><![CDATA[As I’m nearing the end of the Google Summer of Code (GSoC) program with the Tahoe-LAFS community, I can say it has been an amazing learning experience. I learned a lot and was able to solve some important bugs along the way.]]></summary></entry></feed>